So last night was the first night I had ever made dinner all by myself. I made honey sesame chicken, rice and brownies for dessert. The recipe I’m gonna share is for the honey sesame chicken as the rice was plain ol’ normal rice and the brownies were a mix.

Now the recipe I used is for the crock pot and I can’t find the original place it came from but there’s one really similar HERE. I adapted it slightly. Here’s my adapted version.

Ingredients:
5 boneless, skinless chicken breasts
3/4 cup of honey
1/4 cup ketchup
3/4 cup soy sauce
1/2 cup diced onion
1 tablespoon minced garlic
4 teaspoons cornstarch dissolved into 6 tablespoons of water
Salt and Pepper
Sesame Seeds

The original recipe calls for a whole cup of honey, but as my grandma is diabetic, I cut back a bit on the honey at her suggestion. The original recipe also calls for 2 cloves of garlic minces and 4 tablespoons dehydrated onion but as I didn’t have cloves of garlic, I estimated and put 1 tablespoon of garlic in the sauce – which my grandma told me later on that my estimation was pretty much right on and for the onion, I think I accidentally read the recipe wrong or added the part from another recipe as the original calls for the 4 tablespoons dehydrated onion but I put down 1/2 cup diced onion and that’s what I added to the sauce. It worked fine for me and it tasted delicious.

Now for what to do…

Take the chicken, cut off the fat and then lightly salted and peppered both sides before cutting the chicken up into bite sized pieces or cubes. After you’ve done all the chicken, take a medium sized bowl to mix the sauce in.

Here’s a tip for adding the honey… using butter spray, spray the inside of the measuring cup first so when you go to pour the honey into the bowl, it’ll slide out of the cup with no trouble at all. After the honey, add in the ketchup, soy sauce, onion and garlic and mix.

DSCN2818

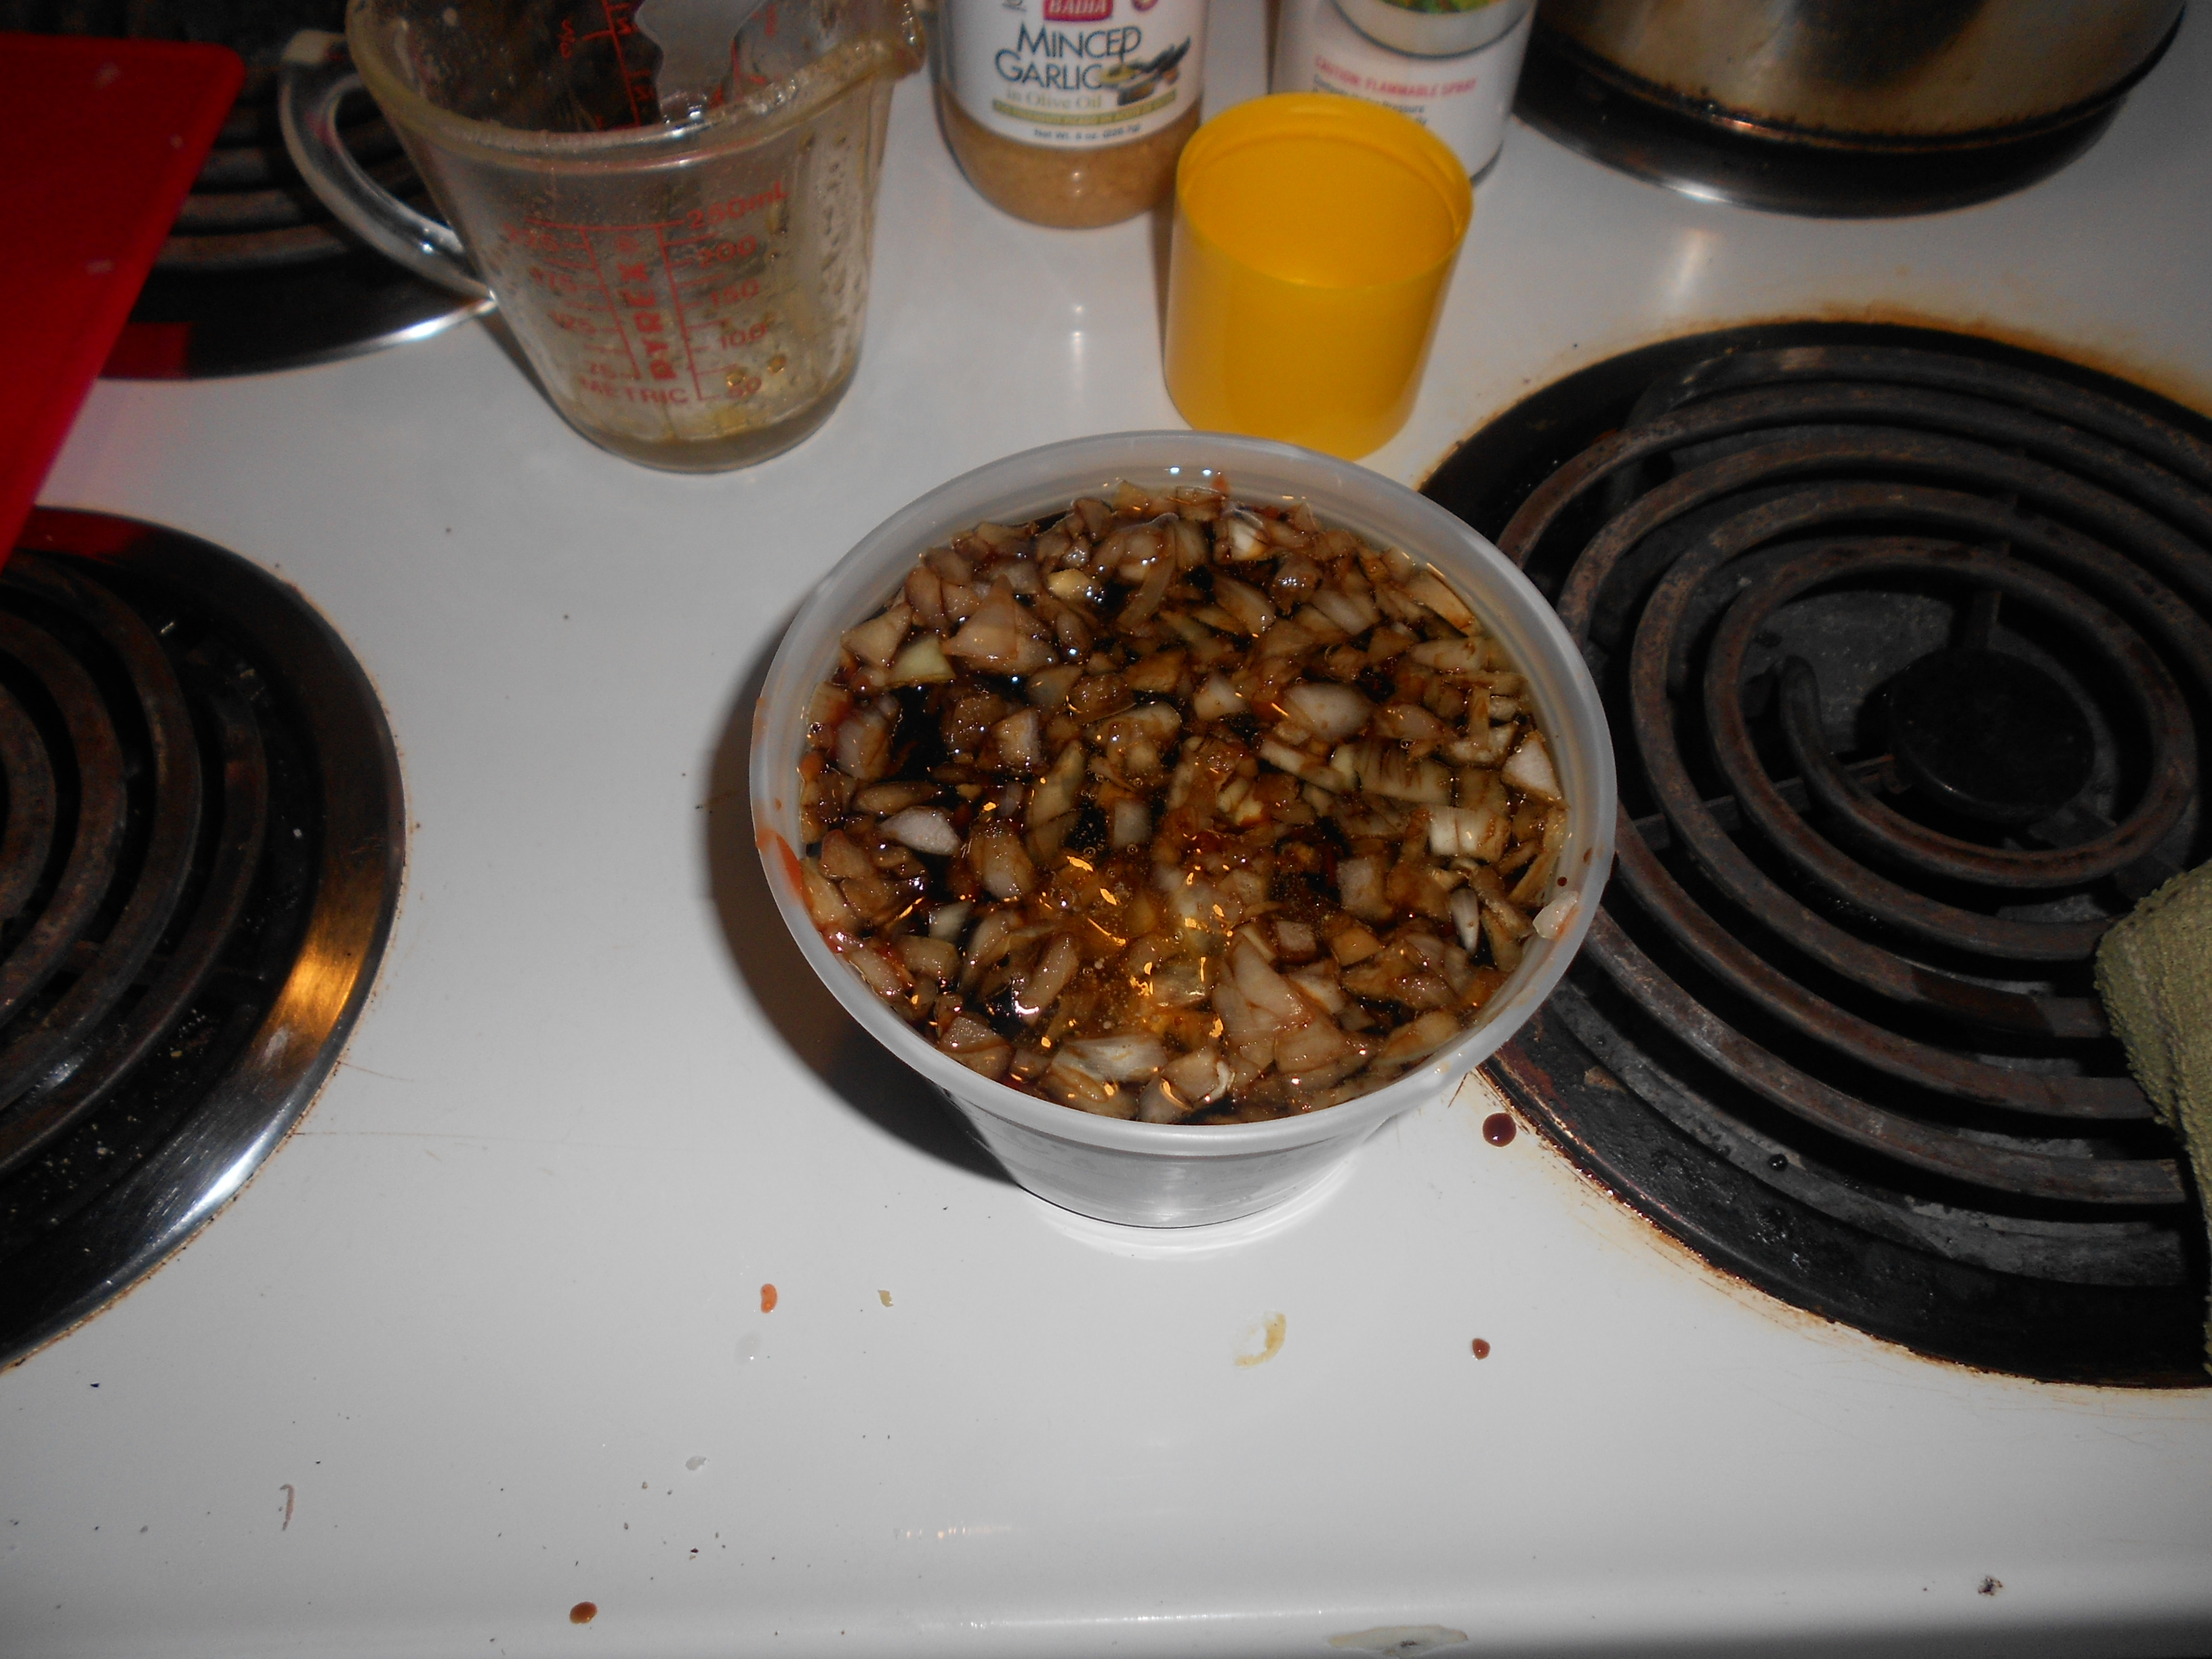
(This is why I said use a medium sized bowl. I used a small one and the mix was about ready to overflow. I had to mix very, VERY carefully. And I know it doesn’t look that yummy but I swear it tastes yummy!)

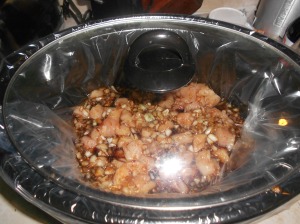
Pour the sauce over the chicken as evenly as you can. Place the lid over the chicken.

DSCN2819

(Dun Dun Dun)

Now for the cooking… I did mine at high and it took about 2 1/2 hours. The original recipe says that on low you can have it cook for 3-4 hours or on high for 1 1/2 hours to 2 1/2 hours.

Within the last 30 minutes of cooking, take 4 teaspoons of cornstarch dissolved in 6 tablespoons of water and add it to the mixture.

When it’s done, serve it with or over rice. Garnish with sesame seeds (which we forgot to do… ).

DSCN2820
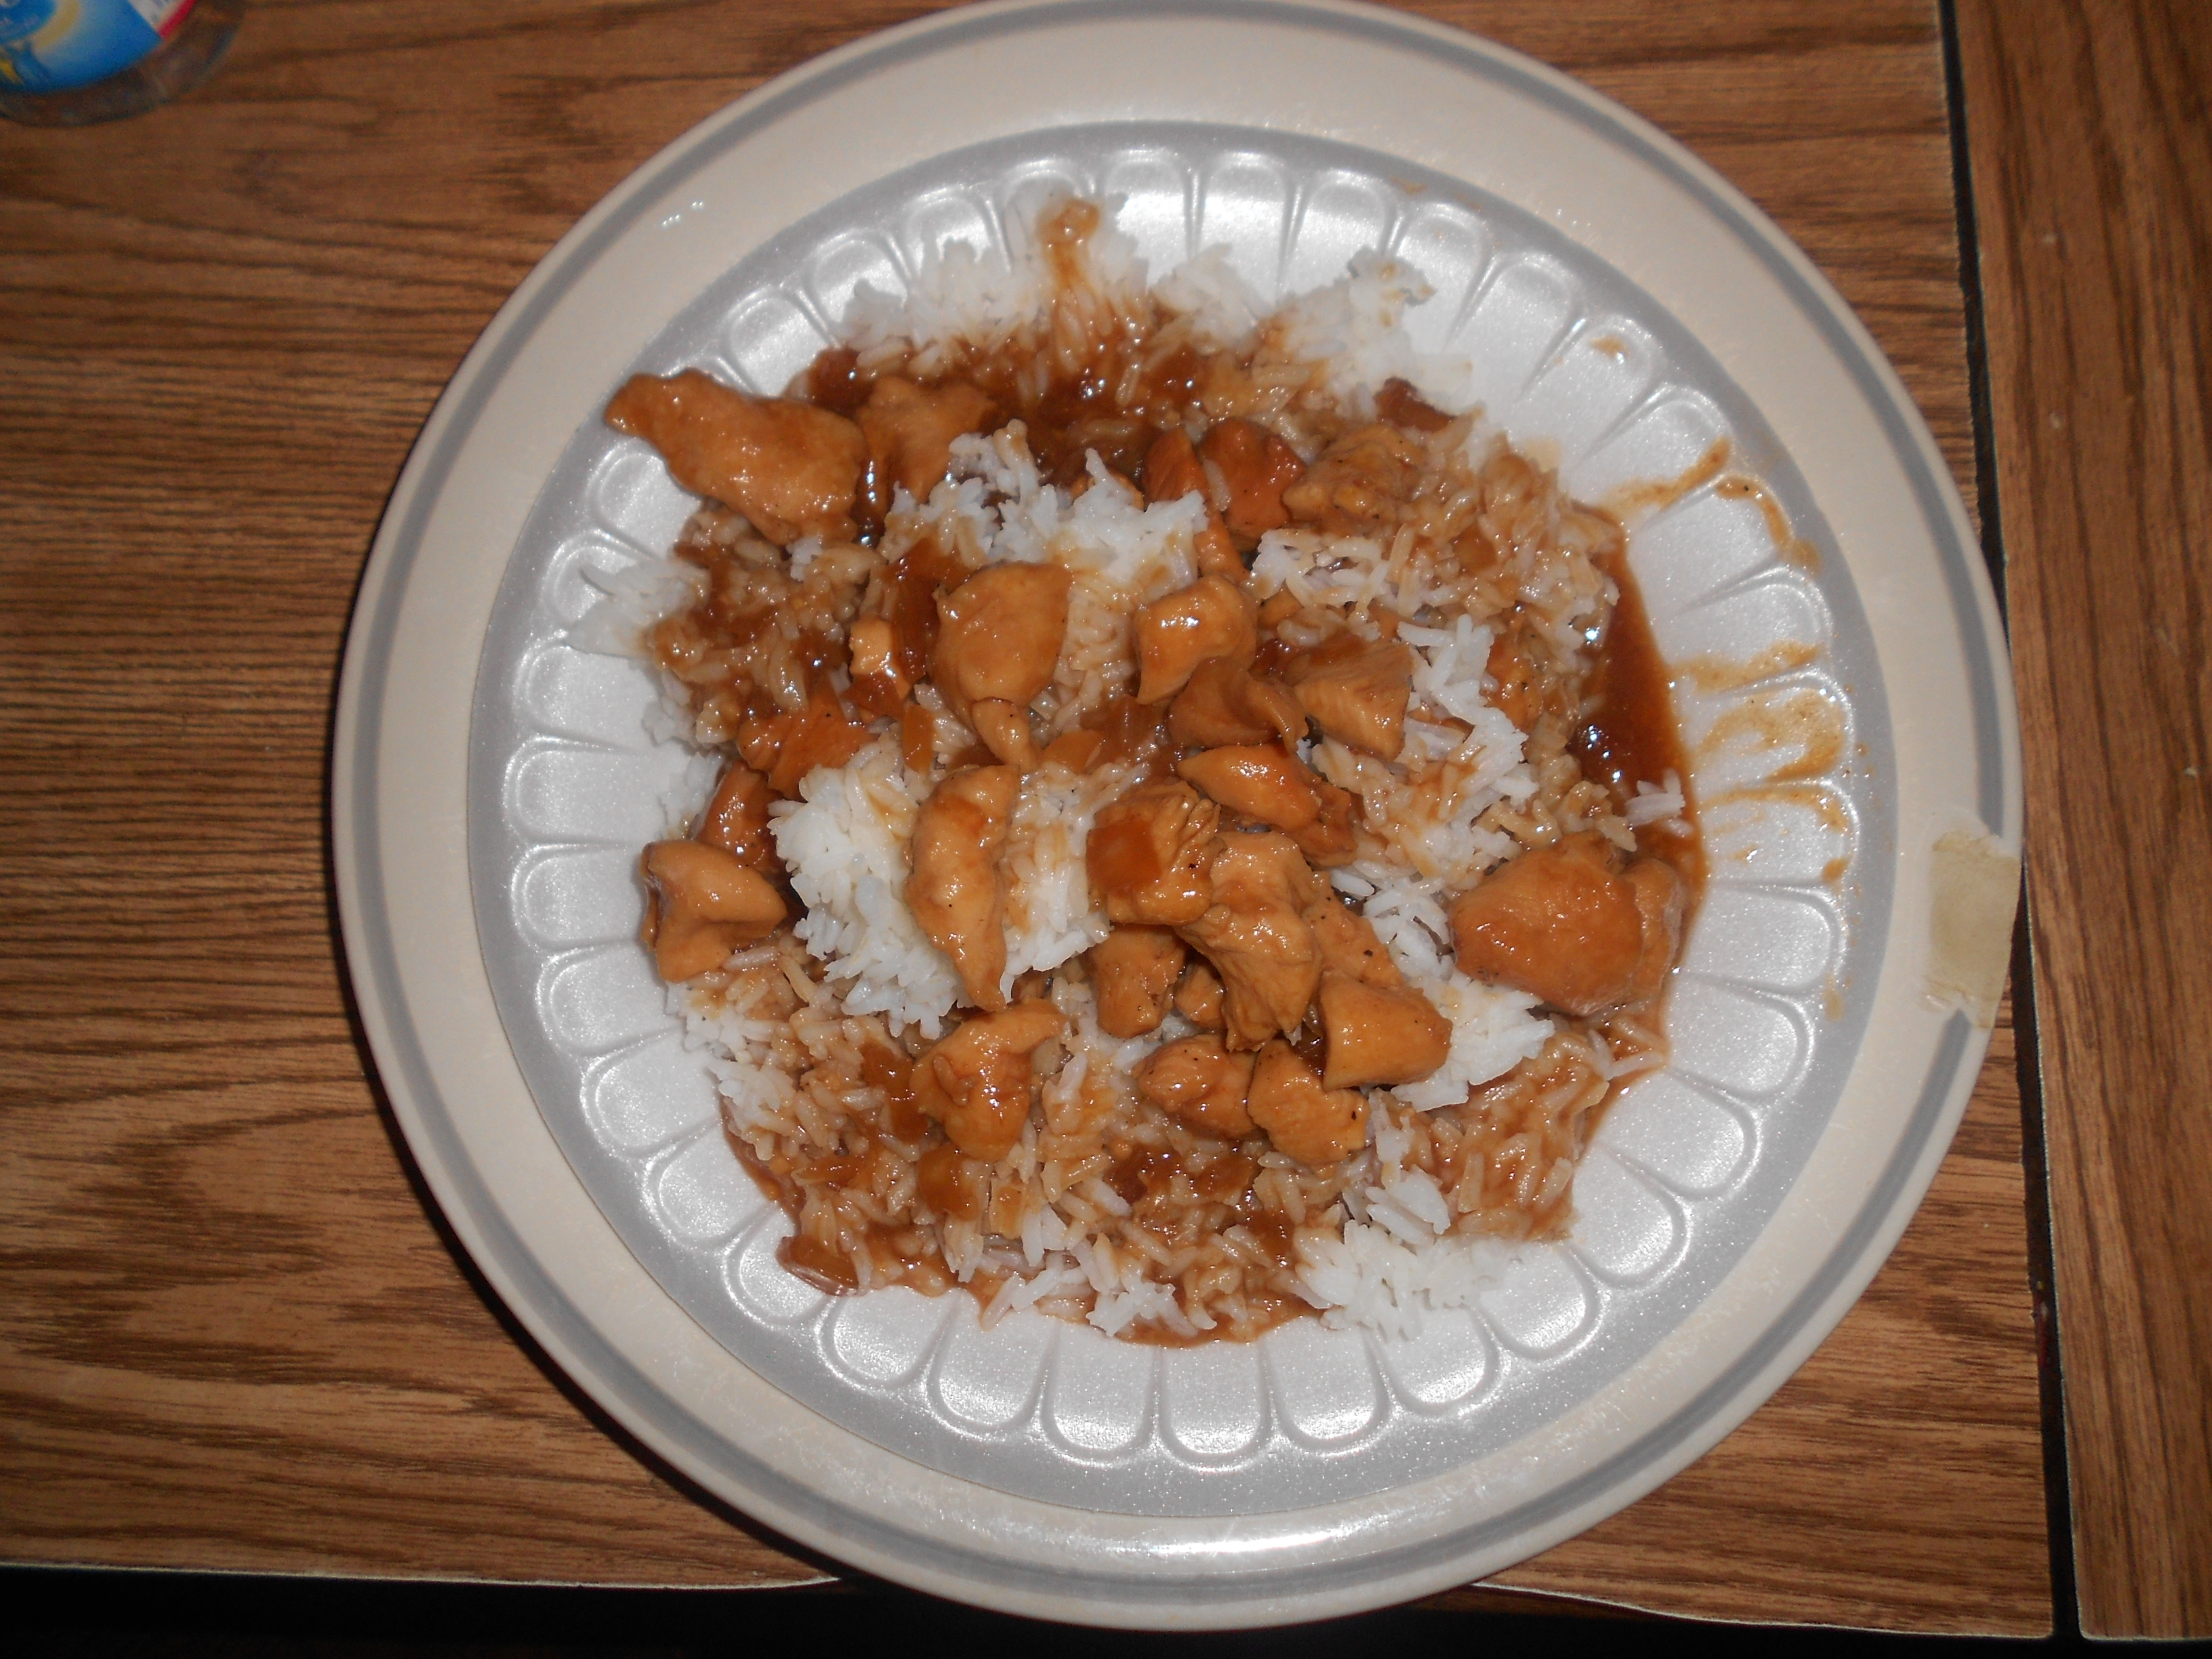
(All of that? Yeah, it was gone pretty quick. Also the whole dish was gone by the next afternoon as I ate the rest of it for lunch. Delicious.)

Then have brownies for dessert or whatever you prefer with a big glass of milk. Or not…whatever.

Till next time!

Tonight will be the first time I will have cooked dinner for the entire family, all by myself. I’ve helped cook dinner before and I’ve made dishes but never the whole dinner. Instead of doing something like Hamburger Helper, I got the okay to try a new recipe. Honey Sesame Chicken! I’ll also be making rice and some brownies. I know the brownies will be delicious as they’re a mix but I got my fingers crossed that the chicken and rice will turn out good – especially the chicken.

Expect (a maybe, hopefully there will be) an update later tonight!

Red Velvet Mug Cake

Anybody who knows me, knows for a fact that I love red velvet. I’d choose that over anything – though it’d be tied with mint as my favorite food flavor. But anyway, I love red velvet and when I found this recipe for single serving red velvet mug cake, I just couldn’t wait to try it. Finally, FINALLY, I was able to do so. I didn’t fiddle with the recipe as this was my first time making it but I think I’ll make some changes next time. The only changes I made, were in how I made it.

The recipe I used is from HERE.

Ingredients:

For the cake:
4 tbsp flour
4 1/2 tbsp sugar
1/8 tsp baking powder
1 1/2 tbsp unsweetened cocoa powder
3 tbsp oil
3 tbsp buttermilk
1 egg
1/2 tsp red food coloring

For the frosting:
2 tbsp cream cheese
2 tbsp butter
1/2 cup sugar

First things first, the recipe calls for oil, but it doesn’t tell you what type of oil to use. I used canola oil which worked just fine for me, but you may want to use something else. Okay, now onto the making of the cake(s)!

Directions:

Mix all the ingredients together in a bowl, using a spoon or small whisk. Warning, it will seem runny but that’s fine.

DSCN2772

(The flour and sugar, waiting for their buddy soda powder to join the party.)

DSCN2774

(The chocolate, egg and buttermilk have joined the party.)

DSCN2776

(Again, the batter will seem kind of runny but it’s fine.)

DSCN2777

(Added in the red food coloring. Next time, I may try blue or green or maybe orange or purple.)

Okay, now unless you have a big over-sized mug, I suggest splitting the batter in between two mugs. It does rise and you don’t want it falling over the edge of the mug, cause then you’ll have a mess to clean up – and red velvet can and will stain things.

DSCN2779

(So pretty. And all mine. MWAHAHA– fine, one mug is for my mom.)

I suggest placing the mugs one at a time in the microwave when cooking them. If you put both mugs in the microwave and it works, then awesome but to be on the safe side, do it one at a time. Place your mug in the microwave and cook for 1 minute and 30 seconds. You may or may not need to cook it for an extra 30 seconds. I didn’t myself but you may.

DSCN2784

(Can you guess which one is mine?)

Now for the frosting. While the cake(s) are cooking (or cooling), put the cream cheese, butter and sugar into a bowl. You can use regular sugar and it’ll work just fine, maybe just a little bit gritty but still delicious; on the other hand, you could try and use powder sugar instead of regular sugar.

Mix the cream cheese, butter and sugar with an electric mixer on high till the frosting is light and fluffy.

DSCN2783

(As you can see, it makes a good amount of icing. Enough for this recipe and maybe two more mugs?)

The hard part was waiting for the cakes to cool so I could put the icing on top of them.

DSCN2785

(C’mon! Hurry up!)

I  tried to make the time pass by more quickly, by washing the dishes I used and cleaning up, but I still finished before they were cool enough. Finally they were cool enough (or maybe, I just couldn’t  wait anymore; the world will never know) and I spooned the icing onto the cakes. There was still a good amount of frosting left, really enough for two more cakes.

DSCN2787

(The finished yummy product.)

I poured two glasses of milk and took the mugs and milk into the other room. I gave my mom her mug, milk and a fork and took mine to my seat. While I waited (or tried to) for her to try it and tell me what she thought, I grew impatient and I went ahead and dug in and groaned because it looked so pretty and then of course, it tasted so damn good. This recipe is a keeper for sure.

There are a few things I will be changing the next time I make this or at least editing a bit. Like the icing. It was delicious but after a few bites, it just tasted so… cream cheesey, which of course it’s made partially from that but it was a bit too much, so next time I think I’ll try toning down the cream cheese and maybe not put so much in.

If you try it, I hope you like it!

Till next time!